
Do you want to upload files to cPanel? If yes, you can do that easily after reading this complete article.
Are you ready? Let’s start this guide…
Upload any files using cPanel :
You just need to follow these simple steps one by one, as mentioned in this article, in order to upload your files.
Alright, let’s start.
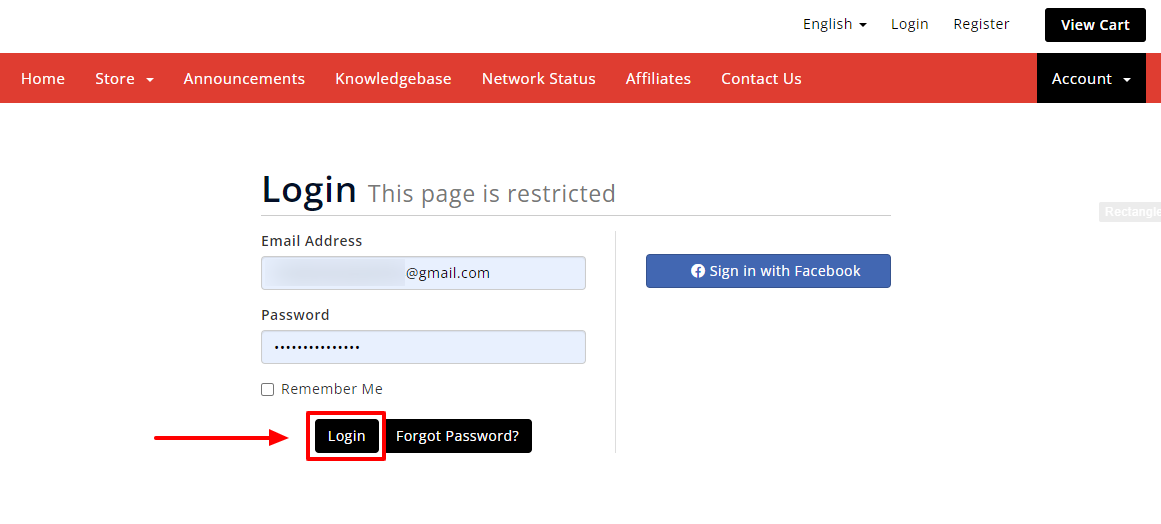
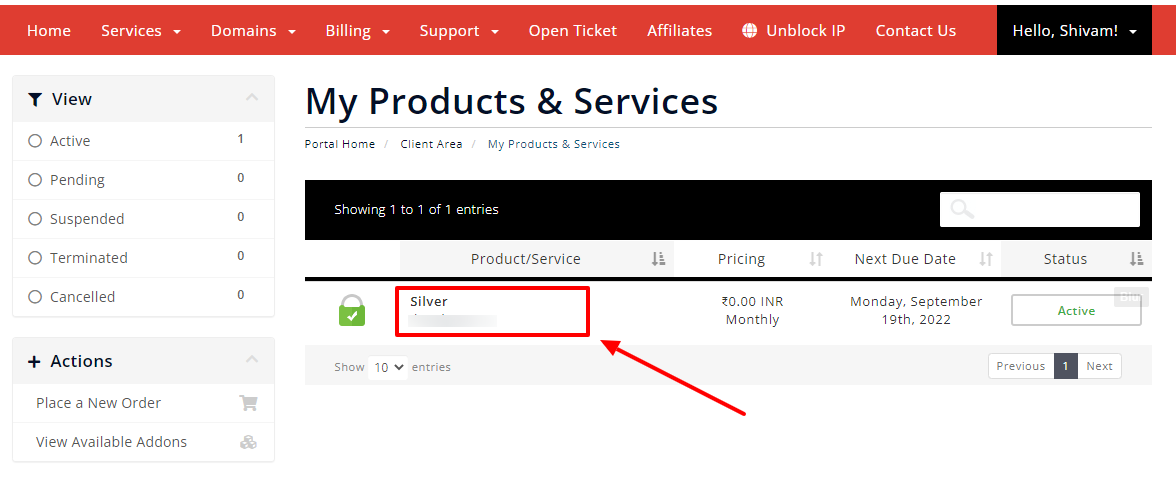
STEP 1 – Log in to cPanel Account
- Go to ShoutCoder.
- Log in to your Account.
- Click on SERVICES.

- Select your Active Product/Services.
- Click on “Login to cPanel” under the Action Tab.
- Or, click on the login to cPanel button just below the nameservers.
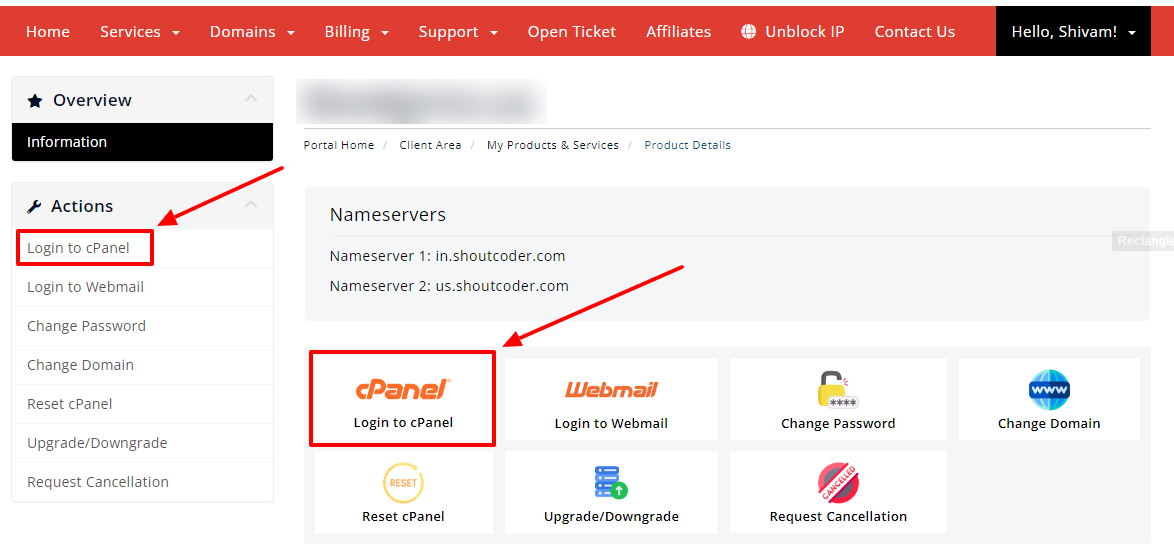
- Then you will automatically be redirected to your cPanel Account.
Or, if you have cPanel login details, then you can easily log in to your cPanel account by visiting yourdomain.com/cpanel.
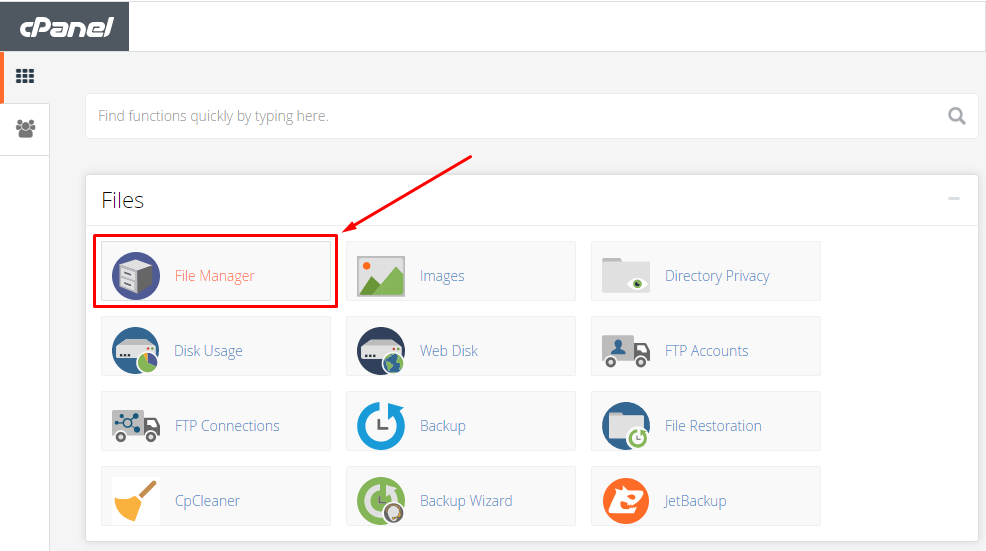
STEP 2 – Go To File Manager
- Search “File Manager” in the search bar.
- Or, look at the first option under FILES.
- Click on the File Manager.
- Now, Click on the “public_html” folder.
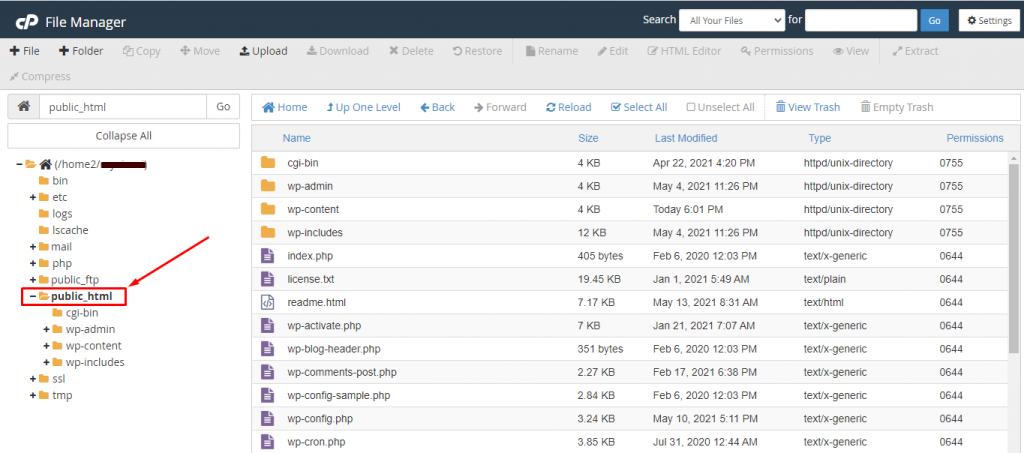
If you have installed WordPress, then you will see some folders along with the files.
If you haven’t installed WordPress or even uploaded anything yet on your site, then it looks empty.
Note: You can also upload your HTML/PHP/or any files under “public_html” directly, but for testing, we’ll create a TEST folder and then upload our HTML file under “public_html/test”.
*OPTIONAL*
- Click on the “➕ Folder” button.
- Name your folder. For e.g. ‘Test’
- Hit on the “Create New Folder” button.
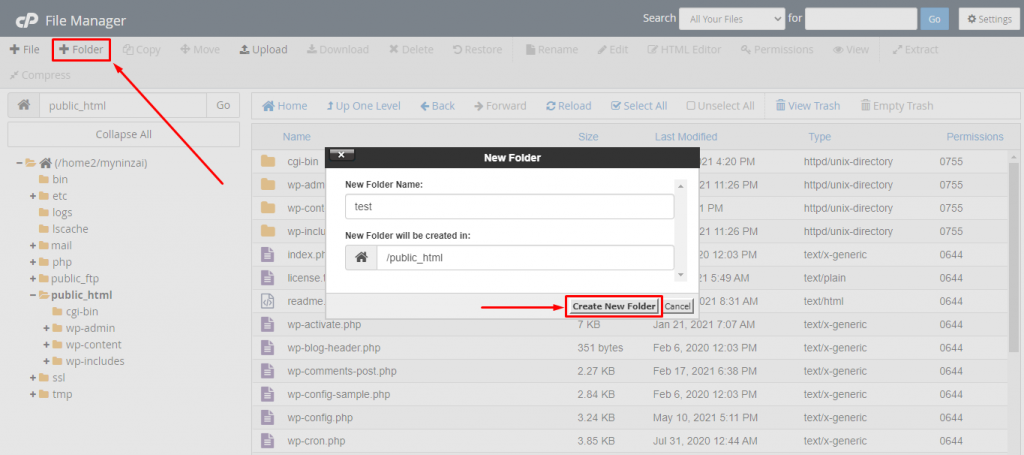
- Great, your folder is created.
STEP 3 – Upload Your File
Open the folder where you want to upload your file, mainly “public_html”, but as we already have many files in that directory, we’ve created a new ‘test’ folder to upload that HTML file, and it looks like “public_html/test”.
- Click on the “UPLOAD” button.
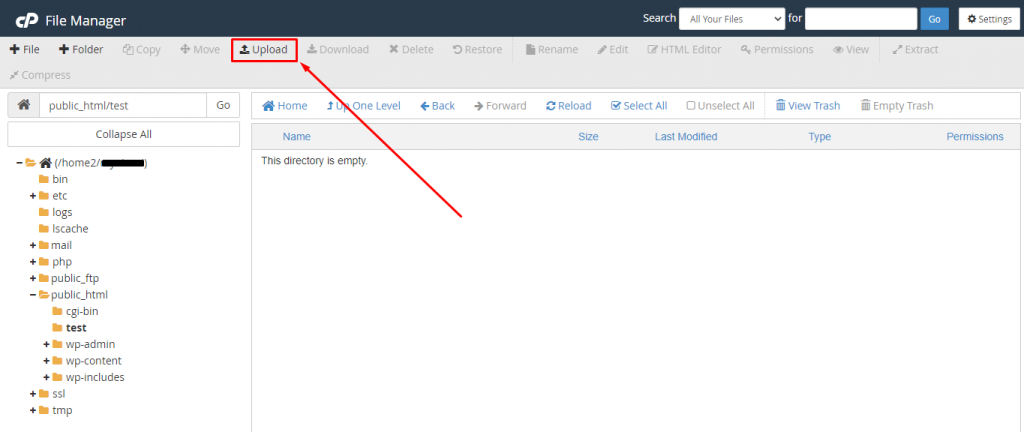
- You will be redirected to a new page.
- Now, Click on “Select File”.
- Or, drag your file directly.
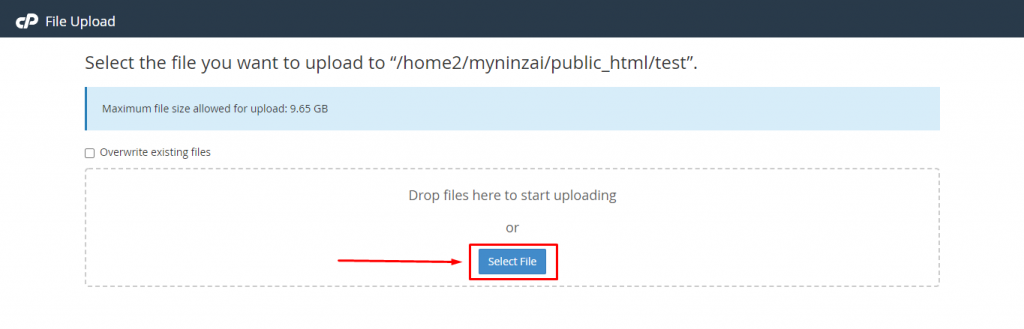
- Wait until the upload gets done.
- Then, click on the “Go Back” button.
- Done! It’s time to check.
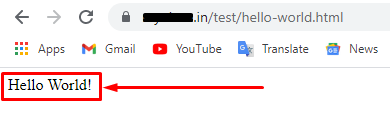
As you know, we created a TEST folder and then uploaded our HTML file named “hello-world”.
So, here it is…
- That’s it.
Thanks for reading this article. Hope your question regarding how to upload your files from cPanel is now completely answered.
If you still have any queries, please let us know through the comments.


