Do you want to upgrade/downgrade plan in ShoutCoder?
If yes then don’t worry! In this article, you gonna learn that how you can easily upgrade or downgrade your web hosting plan in ShoutCoder.
Let’s get started.
Steps to Upgrade/Downgrade plan in ShoutCoder:
You just have to follow 5 simple steps to upgrade or to downgrade your hosting plan inShoutCoder.
STEP 1 –
- Go to ShoutCoder.
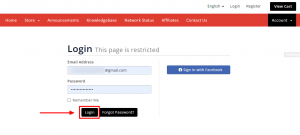
- Type your Email Address.
- Type your Password.
- Login to your Account.

STEP 2 – Select Your Service
- Go to “My Services” under Services.

- Or, you can also click on (1) Services section.
- Now, select the service from the list.

STEP 3 – Choose Upgrade/Downgrade Action
- After you select your services, you need to choose your desired action.

- Here, Click on “Upgrade/Downgrade” option under Action Tab.
- Now choose your desired product among all.
- For e.g.- “Platinum Plan” of Shared Hosting.

- Select your billing cycle first.
- Then, Click on “Choose Product” button.
STEP 4 – Choose Payment Method
- Select the “Payment Method” you want.

- You can also apply Promotional Code if any.
- Right away, Click on “Click to Continue” button.
- Your invoice will be generated.
Now, it’s time to do the payment of your selected plan.
STEP 5 – Complete The Payment
- Simply click on the “Pay with Paytm” button
- Select “PayTM” or “UPI” any one.
- Fill your Registered Phone Number with PayTM.
- Then, Click on Proceed.
If you want to select UPI method then :
- Fill up your UPI Address in the text field.
- Click on “PAY” button.

- Check your device and complete the payment request.
- Congrats, your payment is successful.
Hope, your query is now solved.
If you still have any issue then please comment down below.


